Мы рассмотрим в этой записи пакет под названием lm-sensors.
lm-sensors — утилиты для чтения температуры, вольтажа и оборотов кулера
Установка в Ubuntu/Debian:
# apt install lm-sensors
CentOS/RedHat:
# yum install lm-sensors
После установки необходимо определить поддерживаемые датчики в материнской плате. Делается это командой sensors-detect:
# sensors-detect
Потом нажимаем Enter несколько раз
# sensors-detect revision 6284 (2015-05-31 14:00:33 +0200)
# System: ASUSTeK Computer INC. 1215N [x.x] (laptop)
# Kernel: 4.15.0-50-generic x86_64
# Processor: Intel(R) Atom(TM) CPU D525 @ 1.80GHz (6/28/10)

This program will help you determine which kernel modules you need
to load to use lm_sensors most effectively. It is generally safe
and recommended to accept the default answers to all questions,
unless you know what you're doing.

Some south bridges, CPUs or memory controllers contain embedded sensors.
Do you want to scan for them? This is totally safe. (YES/no):
Module cpuid loaded successfully.
Silicon Integrated Systems SIS5595...                       No
VIA VT82C686 Integrated Sensors...                          No
VIA VT8231 Integrated Sensors...                            No
AMD K8 thermal sensors...                                   No
AMD Family 10h thermal sensors...                           No
AMD Family 11h thermal sensors...                           No
AMD Family 12h and 14h thermal sensors...                   No
AMD Family 15h thermal sensors...                           No
AMD Family 16h thermal sensors...                           No
AMD Family 15h power sensors...                             No
AMD Family 16h power sensors...                             No
Intel digital thermal sensor...                             Success!
    (driver `coretemp')
Intel AMB FB-DIMM thermal sensor...                         No
Intel 5500/5520/X58 thermal sensor...                       No
VIA C7 thermal sensor...                                    No
VIA Nano thermal sensor...                                  No

Some Super I/O chips contain embedded sensors. We have to write to
standard I/O ports to probe them. This is usually safe.
Do you want to scan for Super I/O sensors? (YES/no):
Probing for Super-I/O at 0x2e/0x2f
Trying family `National Semiconductor/ITE'...               No
Trying family `SMSC'...                                     No
Trying family `VIA/Winbond/Nuvoton/Fintek'...               No
Trying family `ITE'...                                      No
Probing for Super-I/O at 0x4e/0x4f
Trying family `National Semiconductor/ITE'...               No
Trying family `SMSC'...                                     No
Trying family `VIA/Winbond/Nuvoton/Fintek'...               No
Trying family `ITE'...                                      No

Some hardware monitoring chips are accessible through the ISA I/O ports.
We have to write to arbitrary I/O ports to probe them. This is usually
safe though. Yes, you do have ISA I/O ports even if you do not have any
ISA slots! Do you want to scan the ISA I/O ports? (YES/no):
Probing for `National Semiconductor LM78' at 0x290...       No
Probing for `National Semiconductor LM79' at 0x290...       No
Probing for `Winbond W83781D' at 0x290...                   No
Probing for `Winbond W83782D' at 0x290...                   No

Lastly, we can probe the I2C/SMBus adapters for connected hardware
monitoring devices. This is the most risky part, and while it works
reasonably well on most systems, it has been reported to cause trouble
on some systems.
Do you want to probe the I2C/SMBus adapters now? (YES/no):
Using driver `i2c-i801' for device 0000:00:1f.3: Intel 82801G ICH7
Module i2c-i801 loaded successfully.

Next adapter: i915 gmbus ssc (i2c-0)
Do you want to scan it? (yes/NO/selectively):
Когда появится такая строка жмем последний раз Enter:
Now follows a summary of the probes I have just done.
Just press ENTER to continue:
И на этот вопрос пишем yes и жмем Enter:
Do you want to add these lines automatically to /etc/modules? (yes/NO)
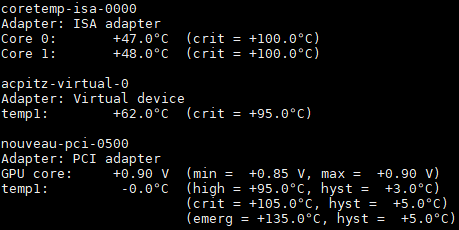
Теперь мы можем посмотреть температуру процессора, вольтаж и обороты кулера:
# sensors
coretemp-isa-0000
Adapter: ISA adapter
Core 0:       +47.0°C  (crit = +100.0°C)
Core 1:       +48.0°C  (crit = +100.0°C)

acpitz-virtual-0
Adapter: Virtual device
temp1:        +62.0°C  (crit = +95.0°C)

nouveau-pci-0500
Adapter: PCI adapter
GPU core:     +0.90 V  (min =  +0.85 V, max =  +0.90 V)
temp1:         -0.0°C  (high = +95.0°C, hyst =  +3.0°C)
                       (crit = +105.0°C, hyst =  +5.0°C)
                       (emerg = +135.0°C, hyst =  +5.0°C)


 Следи за своими финансами легко прямо в Telegram — начни вести учёт доходов и расходов уже сейчас!